I always wanted to make the Clipper Ship block and I did make a pattern and placement guide in 2005 … but it became a UFO and other projects took over … we all know how that goes.
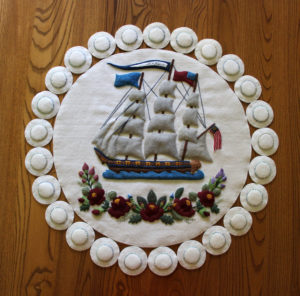
As a history buff and Baltimore album enthusiast I finally made the decision to make the Clipper Ship in wool. I set out to make a pattern based in the original square block and over-size it, adding lamb ears to two sides for a table rug.
A False Start
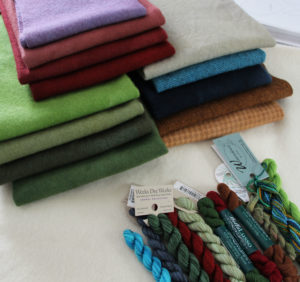
Remaining true to the antebellum period, I chose rich deep colors and decided on a white background to better reflect the sky. I chose off-white wool for the base and began selecting wool fabric came from the Weeks Dye Works (WDW) palate and threads from WDW, Bella Lusso, Medici and Painters Thread. For me, the ability to match the thread with the fabric color is critical and I searched a variety of thread manufacturers to make this happen. Not sure if this would become a teaching piece, I also wanted to use threads and fabrics that would be easily available in the future. I selected herringbone wool for the boat to create texture and I used another herringbone for the water. The color of the sails was a difficult choice as they needed to show against the white background. I finally settled on WDW Birch, which was a soft grey tan, providing the contrast I was hoping for.
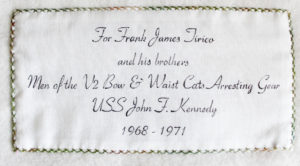
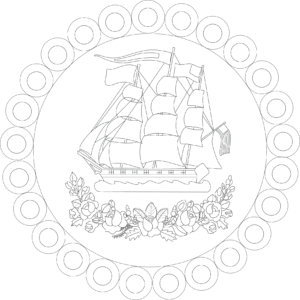 Once I was pleased with the colors, I set out to work making a vinyl overlay to the pattern using a fine Sharpie and began the appliqué process. As I was working and researching the flags and banners of a Clipper Ship, images of my husband and his navy brothers on the flight deck of the JFK entered my mind. I decided to dedicate the project to these men and their service. As I was working away on the appliqué, I was not pleased with the design, something was bothering me and I could not decide what it was. I returned to Adobe Illustrator and began auditioning other shapes for the design. As I placed the Clipper and semi-circle bough of flowers into a circular shape, it dawned on me that this design would look much better in a circle surrounded by pennies. So, back to the drawing board I went and drafted this revised pattern.
Once the new pattern was ready I measured it against the old appliqué I was working on and sadly, there was no way the block could be used for the new circular design, so I began again.
Order of Work
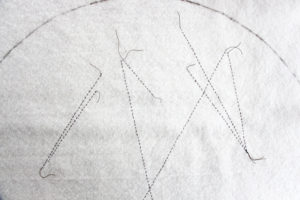
As I began to examine the sails and the rigging, I decided to make a tissue paper embroidery guide for all the back rigging, that is, everything behind the sails. I had an image in my mind of those sails billowing using my slanted needle techniques and so I set off to get the back rigging completed as a first step.

Adding the masts
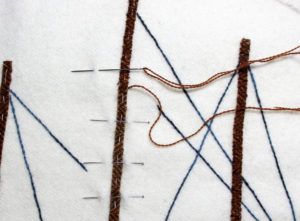
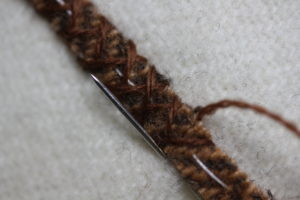
Pleased with that, I added the masts which I rotary cut using a scant ¼ inch. Since the masts were so thin, I decided to herringbone the appliqué which would prevent the piercing of the fabric and add texture.
Boat Construction
Continuing to build the boat, I created the appliqué shapes for the water, ship, sails and roses - basting them in place according to the placement guide. I then began to appliqué and make embellishment decisions to plan for embroidery embellishment.
Once all the sails had been appliquéd and they appeared filled with high winds, I considered how to add the front rigging without flattening the sails. I finally decided to crochet a chain stitch and keep the front rigging detached, anchoring it only at the beginning and end. This seemed to work very well and I was pleased with the preservation of dimension in the sails … but it doesn’t take much for me.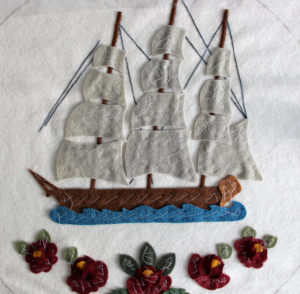
Adding the flags and banners
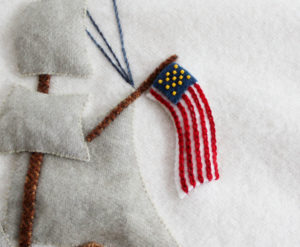
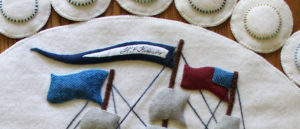
Researching the placement and purpose of flags on vessels, I determined the banner would have the name of the ship. I chose to letter the name of the vessel on muslin and appliqué it into the wool banner. After calculating that only a limited number of letters would fit, I abbreviated the ship name to J. F. Kennedy. I also embroidered the stripes on the American flag and added 13 small beads to represent the 13 states of the antebellum period.
Floral bough
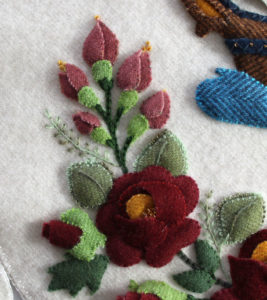
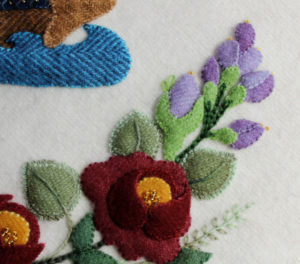
The flowers were more fun than I had anticipated but I did attempt to keep to the Elly Sienkiewicz original pattern. Again, I used a crochet stem to add dimension to the central motif. Rose buds were created by rolling the fabric and beads were also added to the flower centers. I added vines and edge detail to the leaves using colonial knots, lazy daisy and stem stitches.
The dedication
While I was making this piece, I did reflect on the service of my husband and his friends, the men of the USS JFK aircraft carrier. He remains in contact with these guys some 50 years later. They attend reunions and in 2018, there will be a reunion in Newport Beach for the ship itself, inviting all the men who served on her from the plank owners to those on board when she was decommissioned. I salute their service with the Clipper Ship.

Great design!